There is this constant pressure to replace things we own with the better and faster, normally coming bundled with some extra feature that doesn't work well but because it's 'new' most people overlook the flaws until about a year later when they are fed up with whatever it was they bought but just in time for the 'new' thing.
Sometimes however I'm able to find a bit of tech that works incredibly well without any extra frills and it never disappoints me in how it operates.
This brings me to the Sennheiser 280 HD Pro.

2007 is when I bought this pair for $100, it has gone with me just about everywhere and I use it for everything from gaming, music, movies, editing voice over and editing videos. What has been the best for me is once I bought these I've never considered buying a different pair it has fit my head so well and produced a super clean sound.
If there was a counter somewhere for how much audio has come through these headphones I'm pretty sure it could reach 11,000 hours

What I find amazing about this pair is that they seal out sound very well, they are not even built in with some sort of bullshit noise-cancellation that requires power. I can't go on a plane without wearing these, they cut out all the noise of the engine, screaming children and constant coughing. Even without playing anything they keep a great majority of noise out. Traveling by plane or any long trip has been made easier with wearing these.
Even at this point about the only thing showing it's age is the padding and only at this point did I consider buying either a new pair or a different pair altogether. Part of me is easily tempted to buy something that has the term 'audiophile' slapped on the box somewhere but I'm to worried that the cost of a pair of headphones like that won't impress me.

Seams are slowly giving way but I still wear them with comfort.
I've recommenced this pair of headphones to so many people and the one thing I tell them is that the headphones are as neutral as you can get so what you're hearing is purely the sound from the device you're listening to. As someone who likes to hear every little nuance these headphones provide that and if I plug them into a headphone amp they just sound all the better.
Often times I enjoy going for long walks but most of the time it's sadly next to a road with traffic buzzing by but with these on I'm more than able to enjoy every note. Also as a bonus even in the cold of Alaska they work great as earmuffs! My face may be freezing but my ears are enjoying a cozy ride with some lovely jams.
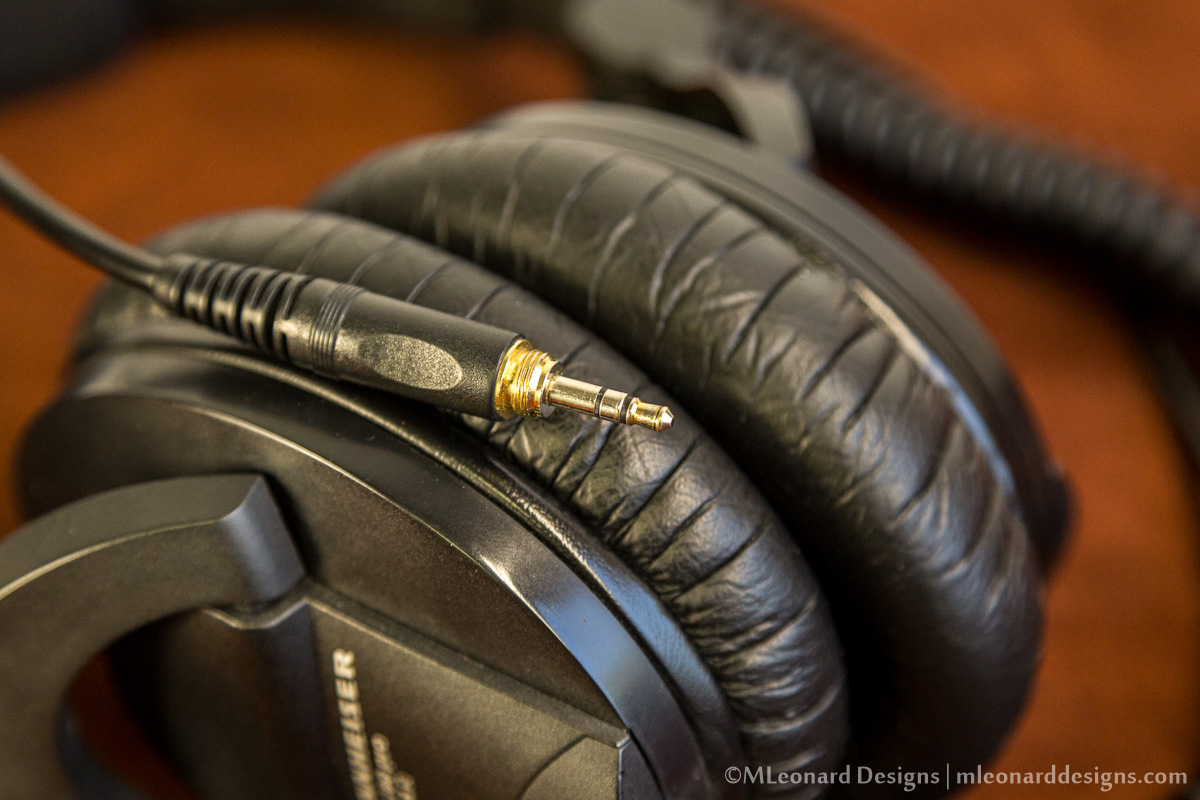
Most of the gold plating is wearing away, still plays fine!
I've used a few different music players with these headphones. The first one was the iPod Video, this was a lovely gift from a friend and at that time I didn't really know about lossless music but I did always rip CDs at 320kbps into mp3s, so that worked when I was out and about but it was plugged into my computer more than the iPod.
Had an iTouch for just a few months, it didn't last as iTunes was nothing but bloatware and no flac support.
The second player I bought (in 2011) was a nice jump up, it was a HiFiMan HM-601. At this point I found about flac and it was much nicer to load music on an SD card rather than through a proxy program. The first music I ripped to flac and played on this player was Daft Punk - Discovery and it was amazing. The HM-601 has a built-in headphone amp and my ears were ruined forever to this new standard of listening.
Most other times I have these headphones plugged into computer playing games mostly and while the internal amp of the HM-601 had spoiled me I was no longer satisfied with the built-in sound cards on most motherboards. Did some poking around and found the ASUS Xonar Essence STX has a dedicated headphone amp! Also it doesn't do any fake 7.1 surround in stero headphones (which a lot of gamer audio gear tried to pull off. Badly). It was just stereo sound and did it very well.
While the HM-601 is a decent player I found myself not liking it's clunky menu system, lack of album art support and other little nit picky details. However I was quick to find the Fiio X5, it took me a while to splurge on buying it as it breaks the cost of what I normally feel comfortable spending on audio gear of any sort. After reading what could be considered the 100th review I felt at ease as it had everything. Compared to my headphones it's very new, bought it in Sept 2014 but so far it's doing everything I wanted and more.

Fiio X5 and Sennheiser 280
What I find most amazing through all of this is that through my transition into better audio gear the consideration into buying different headphones never really passed my mind as with every upgrade the headphones were able to keep up and let me know "Just listen to this".
While I don't really have to defend these headphones they get great reviews everywhere I look it just keeps me happy that there are sometimes something you buy that you can hold onto for a long stretch of time when people are encouraged (if not forced at times) to buy something new when it's only a year old.
Currently while writing this these headphones have been in operation for 8 years and are pumping some juicy music into my ears right now!
Someday these headphones will have to be retired but knowing me I'll attempt to get some custom padding made, re-solder the cord back together, ect. And now that I think about it even more I've had these over 1/4 of my life, clamped to my head!