
In this helpful guide I'm going to go through what I did to make a self-contained Minecraft server at home on the cheap and also keep it low power but can still run 2 or 3 separate worlds at once (depending on the amount of players)
The main thing that bought all of this together is MineOS Turnkey. This linux distribution of Turnkey is ready to deploy with a webGUI for both Minecraft and the OS itself so you won't have to struggle with staring at a terminal all of the time (but you will have to use it sometimes). You'll more than likely be going with the 64-bit version depending on your hardware and speaking of hardware.
Parts!
ASUS Mini ITX AM1I-A
AMD Athlon 5350 APU
Kingston HyperX FURY 8GB Kit (2x4GB) 1600MHz DDR3 CL10 DIMM - Black (HX316C10FBK2/8)
Sentey Mini ITX Ss5-2514 Computer Case
All of this so far brought me up to $222 but I didn't mention a disk drive, you can use really anything but I used a Crucial 128GB M4 SSD for the low noise and low power, though honestly you don't even need 128GB so if you can pick up a cheaper 64GB. With the 128GB SSD in mind everything came together for about $300 total. A HDD with work just fine if you're looking to go as cheap as possible.
On a final note you will need a USB thumb drive to create the boot stick. And an external monitor & keyboard for the very first install. Also I'd recommend getting a Uninterruptible power supply if you plan on leaving this on for other players for long periods of time. As this is so low power even the cheapest one will give you a safety net to power outages and brown outs.
Hardware setup
As this build is straight forward there isn't really anything to point out other than to put it all together and if you've ordered different parts you'll have to go on your own anyway, but here are some photos.

The front of the case. An internal 3.5-inch SATA drive for size comparison. I also printed the IP number on the case with a label maker.

Power and Ethernet, in the end that's all the system needs to run as a server.
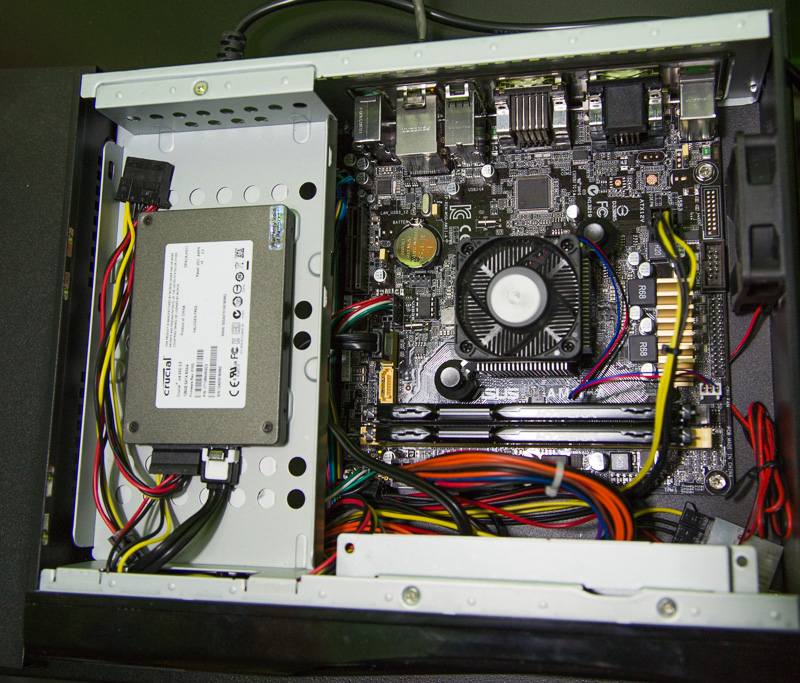
Cords are easy to keep out of the way, there is hardly anything in here!
OS Setup
Everything is together and now you're ready to get MineOS on here. Note that you will need a monitor and keyboard for the initial setup.
First part is to download the ISO, head on over to minecraft.codeemo.com and download the version you need (likely 64 bit). While you're downloading grab Rufus, this is the bit of software I use to make bootable ISOs.
Once your download is done stick in your USB thumb drive and open up Rufus, from here all you have to do is make sure the drive letter is the same as the USB thumb drive and then click the CD image icon to open a window to find the ISO, load it up and hit start!
Once it's done safely remove the thumb drive and plug it into your soon to be stand alone minecraft server. When booting make sure the first bootable device is the USB thumb drive.
Go through all the steps of the install.
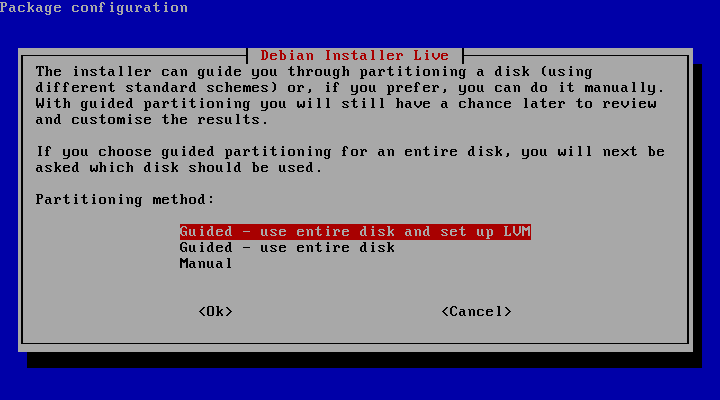
As this is a standalone server guided install with LVM is your bet option.

This is just confirming which disk to install to, and LVM is good to have for future changes.

This is tell you about what percentage of the HDD you can use, just hit ok.

90% is what it gives you by default and I use that just in case something happens and there needs to be something installed in that 10%.

This is the guided installers final report, if you are using a single disk drive bets are good it did everything perfectly. Hit yes.

This window is asking if it should install GRUB and yes you should.

Restart away and remove the USB thumb drive.

This is GRUB giving you options but it will auto start with the default selection in a few seconds.

Make a password for the root account, make a good one.

Make a password for the m account, this is for editing the minecraft servers, it should be different from the root password.

TurnKey Linux comes with a build in backup function called tklbam, you won't really need this so go ahead and skip it (sorry I'm highlighting apply here, just ignore that)

Install the updates!

Here is the final screen of the OS, write down all the IP numbers and their names you see above TKLBAM, you'll need this for later.
Firewall/Router setup
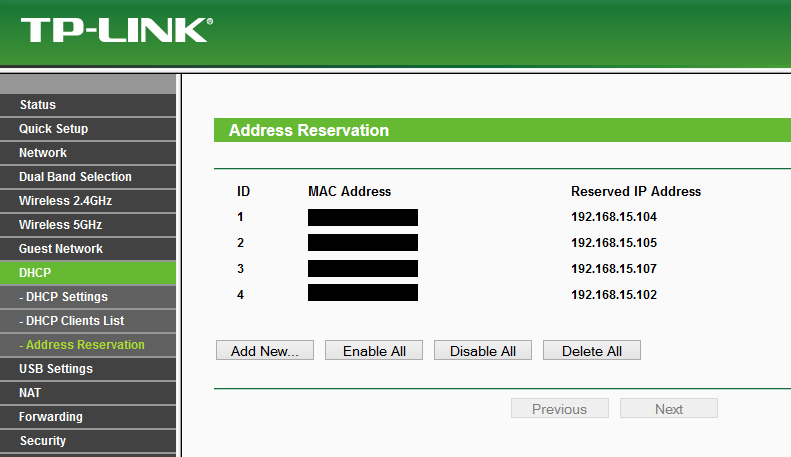
One thing I highly recommend to do within your router is to reserve an IP address for your server so you won't have to keep hunting down a new IP just in case your router needs to be restarted (or power loss).
You'll need to be able to make changes to your router, if you know the IP to that then you can skip this next bit. If you don't know your router IP, an easy way to check it on windows is to hit the windows key, then type on the keyboard:
cmd
Hit enter and a command prompt should come up, type in:
ipconfig
Hit enter and a list of numbers will show up, look for Default Gateway, this should be your router. For example the router is 192.168.1.1 (most common home routers use this), now go into your browser and type in the address of 192.168.1.1. At this point a dialog will ask for user name and password, if you haven't setup anything in your router it's a good bet that the user name will be admin and password could be either admin, 12345 or password. If you're having a hard time getting into your router go to the manufactures website and find a manual.
If you only have a modem from your ISP then there is a good chance it won't have more than one ethernet port anyway so you'll need a router.
Once in your router then look for DHCP Reservation list, here I can't really guide you as each router is always different but what you're doing is locking in the IP address with the MAC address of the server.
If you don't know the MAC address of your server check the box the motherboard came in, if it's not listed anywhere we will get the MAC address here in a bit.
If you never plan to let anyone access your server via the net you can ignore this part and head on to Minecraft setup.
To get payers from the net to access your local server you'll need to forward a port in your router so it knows internet traffic can directly look at the minecraft server. This is going to be different from router to router so I'll just direct you to PortForward.com about Minecraft. 25565 is the default port for the server but you'll have to open another port if you have more than one server.
If you plan on having another minecraft server you'll have to mess with the Iptables, here is the direct link to the page about how to do that.
http://minecraft.codeemo.com/mineoswiki/index.php?title=Iptables
Minecraft Setup
Nothing on fire yet? Good!
We first need to update the WebUI so it knows about the newest minecraft server version. Get the number listed as Web Shell from the server and direct your browser there, an example being
https://192.168.1.7:12320
Your browser might complain about it not being a safe site but you're safe to keep going, it's just using https without a proper certificate. Once there you'll be greeted with a black screen and the prompt "core login" type in root and then enter, then type in your password, enter
You should be logged in as root, now type in the following with every new line being an enter key stroke.
cd /usr/games/minecraft
git fetch
git merge origin/master
It should show something as it does below in the screenshot.

While we are here, type in ifconfig then enter. Look for eth0 and then the HWaddr listed to it, that is the MAC address if you were having problems finding it.
Now direct your browser to the MineOS Web-Ui address, example being
https://192.168.1.7:8080
Again the browser will warn you about it being insecure but you're fine. Enter mc as the user name and then your password and sign in. From here click Manage Profiles.

Click "Create Stock Profile" right now the most current is 1.8.4 but it could be newer for you.

It has made a listing for the 1.8.4 stock profile but it's now downloaded yet, hit the green update button and wait a moment (can take a bit if the hosting server is bogged).

Now lets make a minecraft server, click Create New Server. Give it a name and leave ownership to mc, click next.
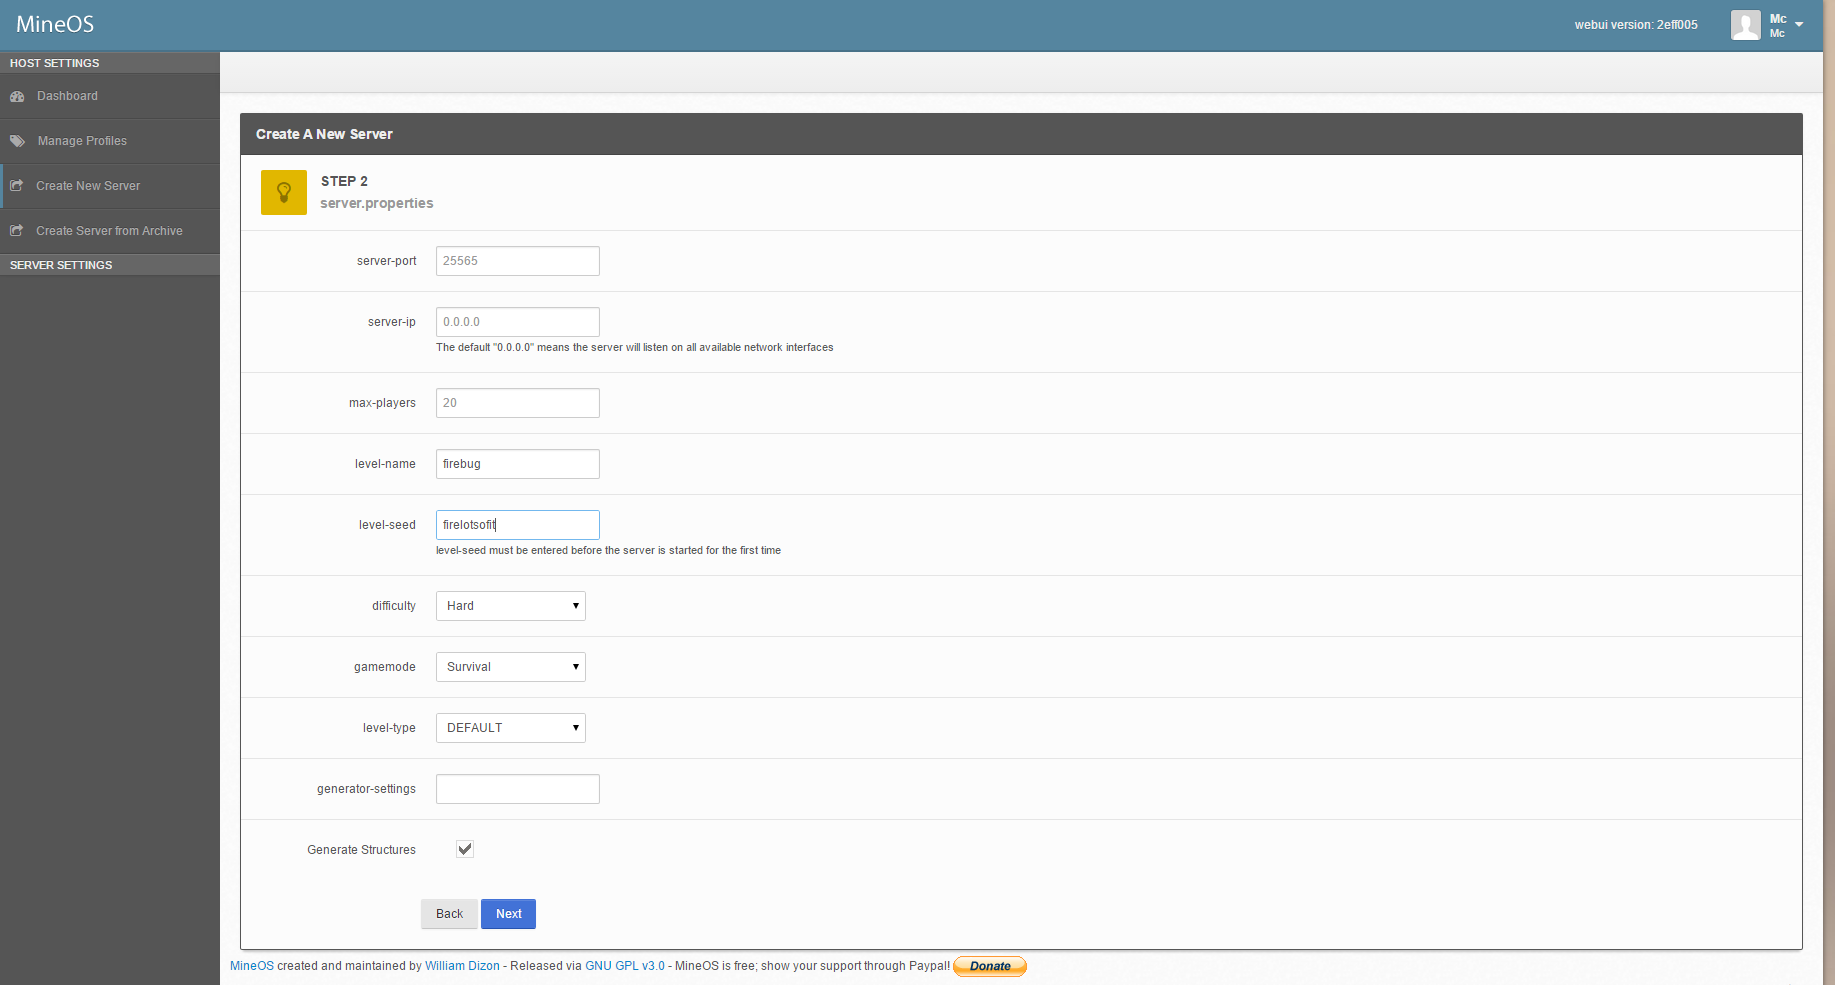
I would reccomend entering in something in level-name as it helps in case you need to recover backups from the disk. level-seed is optional but if you know of a seed ahead of time here is your one and only chance. Everything else here is up to you, only thing to note is that if you're making more than one server running at a time give the server-port a different number (25566 for the second server, 25567 for the third, ect.)

Make sure the profile is the one newest one.
Both java_xmx and java_xms should be changed to something larger. To figure out how much, know ahead of time how many servers you're going to have. Lets say two and you have 8GB of ram remove 512MB for system stuff and then split that per server, so you'd have 3744MB of RAM to spare for the two servers and put the same number in both xmx and xms.
Enable Archive and Backup interval, I'm never that busy on the server so I only do 24hr but you can make it shorter.
Enable Start Server on Boot!

From here you can click each server and look at their settings and real-time log of what is going on. Go ahead and start your new server and log into it!
As you might of noticed my servers are still 1.8.3 and as time goes on I'll need to update the servers, this is really easy. Just do the same thing from when you logged into the Web Shell (https://192.168.1.7:12320) with the black screen and redo the three commands:
cd /usr/games/minecraft
git fetch
git merge origin/master
If you've had any windows/tabs open with the Web-UI close them and log back into it so it can refresh the changes. Click on Manage Profiles and click Create Stock Profile, select the newest version then the update button.
Click on the dashboard and select the name of the server you want to update and a new selection on the left should show up, click on server.config, it will be the first dialog box and in my case I'm rename it from vanilla183 to vanilla184 then hit enter. All done the server is now running the latest version of minecraft!
If you run into any problems trying to git fetch go here:
http://minecraft.codeemo.com/mineoswiki/index.php?title=Updating_the_Webui
This is about the only thing you'll have to manually do, other than that linux will keep itself up to date and the servers will back up (if you've told them too).
Power Consumption
Powering up it spikes at 35 to 40 watts but once it's done things settle to 25 watts even with people playing on it. Planning on leaving it on 24/7? Well here are some numbers for you its kWh of a day is 0.6 and the kWh year is 219.
To put that into a perspective a 60 watt incandescent light bulb kWh of a day is 1.44 and the kWh year 525.6.

I have my server on a UPS, again optional but if you know you're area is prone to black outs/brown outs I'd say it's worth getting one.
Hope this was all helpful, let me know if there is any glaring errors to fix.